
Tips For Getting a Well Balanced Low-End
Achieving a well-balanced low-end can be tough! This article offers some tips that will help you get a tight low-end that translates well on different sound systems.


Getting a well-balanced low-end can be very tricky. In this blog post, you’ll learn some tips that will help you get a tight low-end that translates well on different sound systems.
One thing to always keep in mind is that not everyone (i.e. your listeners) has £2,000 to spend on speakers. So, it’s important to make sure that the low-end in your mixes sound great even on small speakers.
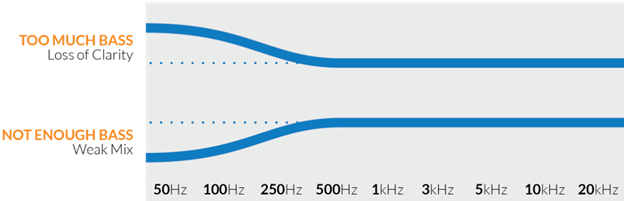
Having a thin low-end can make a great song sound weak. Conversely, if your mix has too much low-end it will sound muddy and lack intelligibility. Therefore, it’s imperative to get the low-end well balanced on every mix you do.
Complementary Sounds
A good low-end always starts with a good relationship between kick and bass. Of course, not forgetting a good performance and arrangement of both instruments.
It’s crucial to spend enough time during recording or sound design to make sure that your kick and bass complement each other.
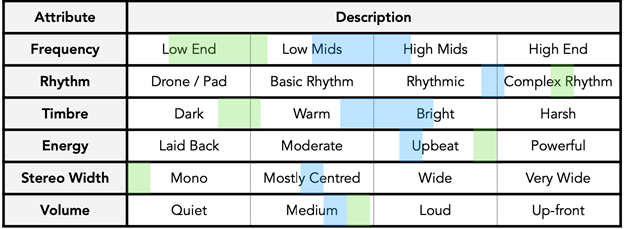
If you’re using samples then choose samples that naturally work well together without clashing. Think about the various attributes of the different sounds and make sure they don’t overlap. An example can be seen below with two sounds, one showing the characteristics in green and the other in blue.
The best mixing engineers usually get a head start with a well-balanced low-end because they often work with talented producers.
If you’re mixing your own music then think about which sound is going to dominate the subs and which one is going to dominate the upper-bass frequencies during the production stage.
When working with a client, if the kick and bass don’t compliment each other, it might be worth suggesting that the client re-records or replaces the sounds. This is not always possible, but if it is, and it gets the client the best possible sound, you will have delivered a huge amount of value and instilled great trust in your services.
One thing you don’t want to do is to force sounds that are clashing to work well together.
Getting a great-sounding low-end is all about getting the right sounds straight from the source without relying on fixing things in the mix.
Room and Monitoring
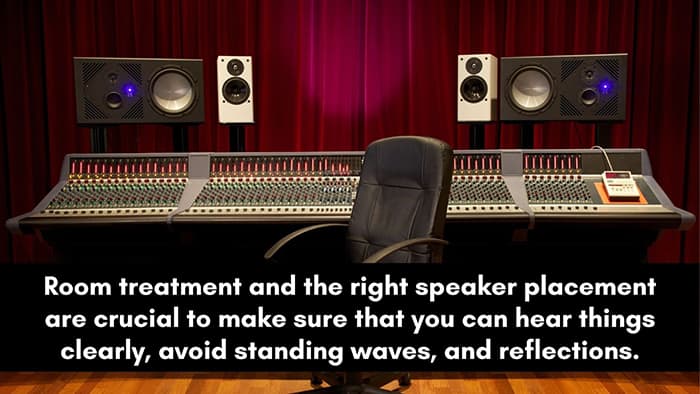
Mixing in an untreated room is like painting in the dark, so use acoustic treatment, or headphone/speaker correction software to give you the flattest listening experience.
Before investing in a pair of studio monitors, you need to check the frequency response to make sure that you’ll be able to hear the low-end. Some cheaper monitors simply don’t produce sounds below 50hz, so you wouldn’t hear the sub frequencies.
After treating your room and getting monitors that have a great sub and bass frequency response, you’ll need to position the speakers correctly.
You can find more information about monitor placement by reading the manual that comes with your speakers.
Monitoring volume is also a crucial factor. We hear frequencies differently at various volume levels. We hear less bass when it's quieter, and more bass when it's louder. To learn how to set the perfect monitoring levels, check out our guide here.
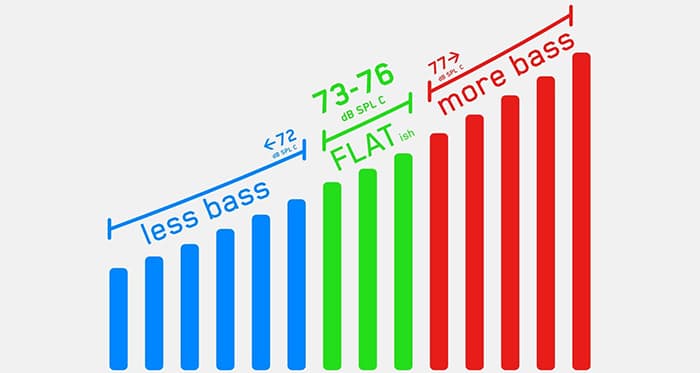
Mixing at loud volumes for too long can cause ear damage, fatigue, and lead you to make wrong decisions. It’s also worth noting that reflections and other non-acoustically-treated room issues are exaggerated when you monitor at loud volumes. So leaning towards ‘too quiet’ is preferable to ‘too loud’.
Start With the Levels
Always start by getting the entire mix balanced in terms of volume and panning. Even if it’s a rough balance it’s fine.
As we learned in the previous paragraph, louder sounds can be perceived to have more low-end. This is also true of individual channels in your mix. This is why it’s always worth setting a balance before reaching for any plugins when mixing.
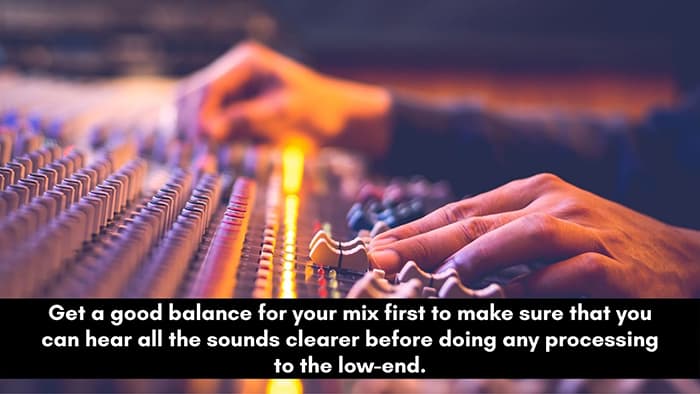
Avoid processing the low-end until you get a good balance for the entire mix. That way you’ll be able to hear everything in context.
Glue the Low-End
To glue and get better control for the low-end, send all the low-end instruments to a bus or group channel.
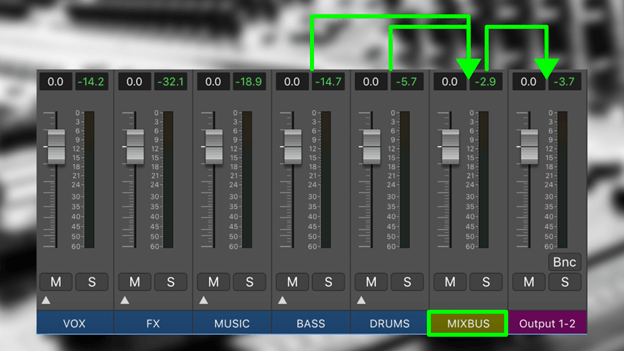
This approach will give you much more flexibility.
For instance, if you’re working on a jazz record, you’ll need a very minimal amount of compression to keep things dynamic. But if the low-end is too dynamic, it might not translate well on small speakers.
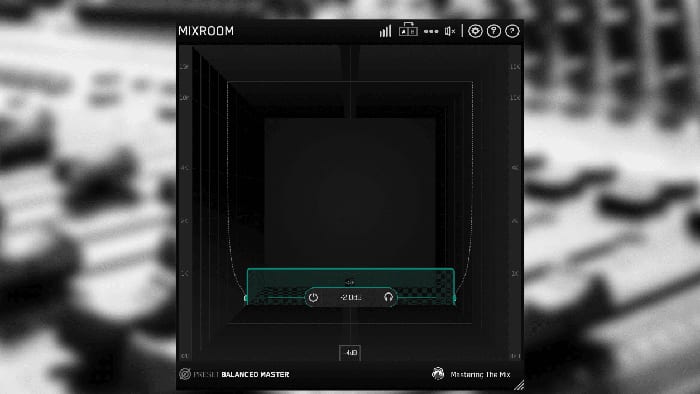
To fix that problem, you can use parallel compression on the ‘low-end bus’ to reduce dynamic range and glue the two instruments together.
Subtly blend the parallel track together with the original signal. You just want to feel the parallel processing instead of hearing it.
When compressing the low-end bus/group make sure that you don’t squash the signal or make the low-end sound too thin. Aim to thicken the sound.
A good starting point would be to use a slow attack, auto-release, 2:1 ratio, and a gain reduction of about -2dB. Then adjust everything to taste, and glue the low-end without squashing the signal or causing any pumping. (Pumping is where the compressor gives additional movement to the audio which can sometimes be out of sync with the song which can change the groove).
Saturate The Bus/Group
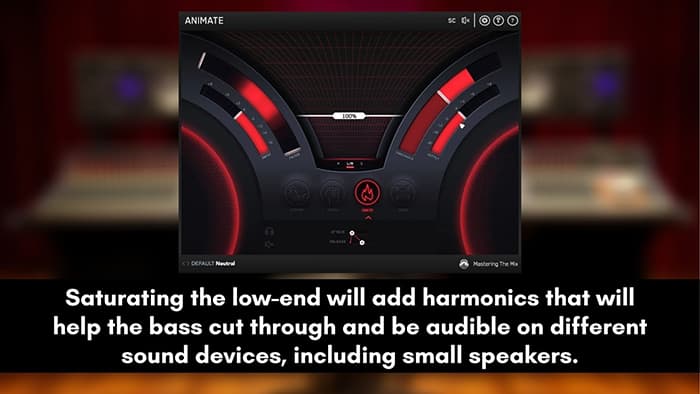
Another great technique that will help you make sure that the low-end translates well on different sound devices is to use saturation.
Using saturation on the low-end bus will also add harmonics and add glue to the bus.
The best approach would be to send the bus to an Aux/Fx channel to allow you to control the saturation effect. You can apply EQ on the Aux to make sure the added harmonics don’t clutter the mix or add unwanted frequencies.
ANIMATE by Mastering The Mix has a distortion module called IGNITE. IGNITE gives you control over which frequencies you apply the harmonic distortion to. It also allows you to trigger the distortion dynamically to audio as well as affecting either mid or side channels.
Control Dynamic Range
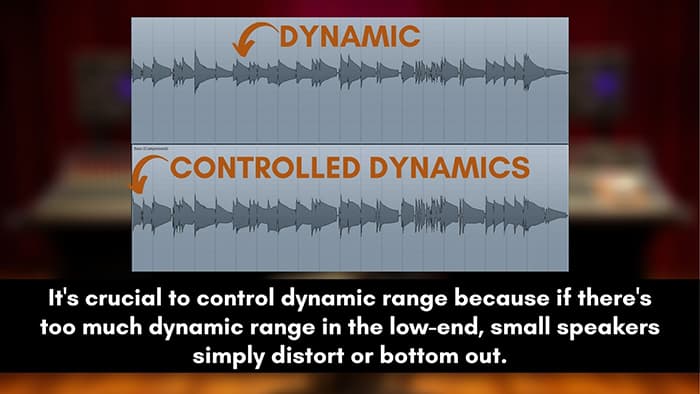
Smaller speakers have a limited dynamic range. Overly dynamic songs might lead to a negative listening experience on smaller speakers due to some element being inaudible, leading to distortion when the listener turns up the sound.
Small speakers such as headphones, laptops, AirPods, bluetooth speakers, phones, can’t produce bass content effectively. Adding harmonics and using compression to control the dynamic range can help the bass translate better on these systems.
Begin by using compression to make sure that the low-end is not too dynamic. Then use saturation or a bass enhancement plugin to bring up the bass content in the midrange.
This will help the low-end will translate well no matter what device is being used to play the song.
Split Low-End for Clarity
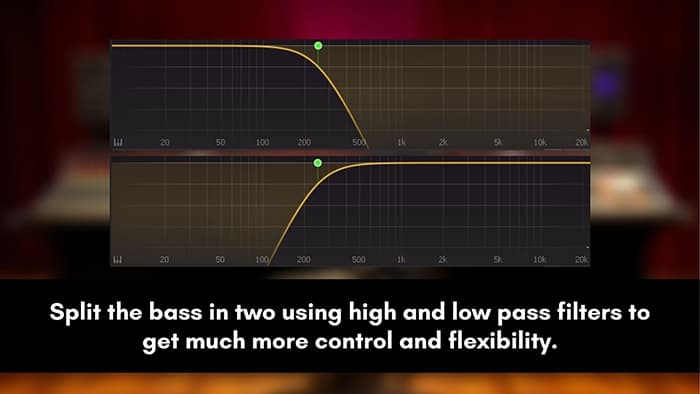
Another trick that will help you make the low-end much clearer is to split the low-end.
You can split the individual channels or the bus, it’s just a matter of taste, there’s no right or wrong approach.
The goal is to split the low-end into two parts. One part will be the sub and bass frequencies (0Hz to 250Hz) and the other will be the midrange and high frequencies (250Hz to 20kHz).
These two frequency ranges behave differently. By splitting them, you can apply processing that’s most appropriate to their character. For example, you can add minimal processing on the sub and bass frequencies and then add more processing on the upper part of the low-end to control the dynamic range.
Note that adding a bass enhancement plugin on the upper part of the low-end might not work as these plugins often don’t affect any audio above 250Hz.
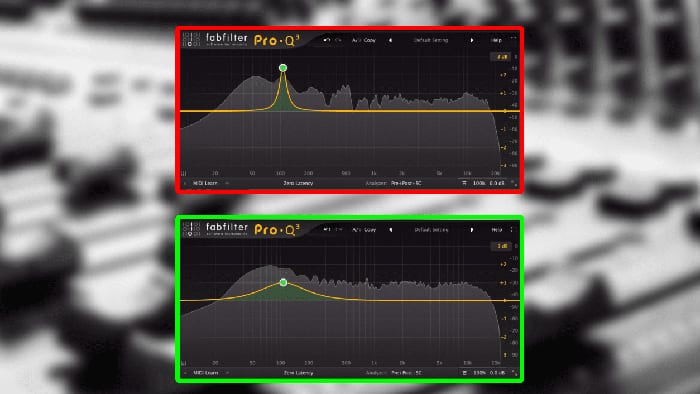
Wide vs Narrow Cuts and Boosts
Bass notes jump around on most groovy basslines, so it is recommended to avoid using narrow cuts.
By using narrow cuts you’ll only affect certain notes. This will maintain the original volume of some notes while the notes you’ve cut will be quieter. That could mess up the performance of a good bass line.
If you’re looking to control a single loud note in the performance then this approach is needed.
The same principle also applies to the boosts as well. When boosting a bass, use a wide boost to make sure that you’re not only boosting one note.
Things only change when you’re equalizing other low-end sounds where notes don’t keep changing. You can use narrow cuts or boosts on instruments such as the kick drum and floor tom.
For instance, a wide boost at 50Hz on a kick might bring up too much low-end information and create clutter.
When it comes to the 808, your approach should depend on whether it keeps changing notes or whether it plays a single note. If it keeps changing notes then I suggest you treat it like a bass, if it’s playing a single note then treat it like a kick drum.
However, there are exceptions, you might be working on a bass that has some ringing on a particular note. In that case, a narrow, dynamic EQ cut will be best to solve the problem.
Clean the Lower Midrange
Beginner engineers usually focus on the subs and bass frequencies to try to make the low-end instruments sound clear in a mix.
In some cases, the lower frequencies might not be the problem. A lot of clutter in the lower midrange can mask the kick and bass, preventing them from being clearly audible.
When the lower mids are cluttered the mix will sound muddy which can prevent the low-end from sounding clear.
Sometimes a wide boost in the lower mids around the 250Hz to 300Hz range on bass can help it cut through. But, before considering a boost, see if you can cut those frequencies on other instruments.
A cut around 400Hz to 500Hz on the kick can also create clarity in the lower mids and help the bass become more audible in the mix.
Try keeping the frequencies between 200Hz to 400Hz balanced and controlled on other sounds in the mix to avoid clutter and muddiness.
Check Mono Compatibility
Mono-compatible is especially important if you’re mixing a song that’s going to be played in a club.
Most club systems use mono to keep the sound consistent throughout the venue.
Most small speaker devices are usually mono and not stereo (with the exception of the newer smartphones).
During mixing, use LEVELS to switch between mono and stereo to hear how the balance of the low-end sounds on both stereo and mono.
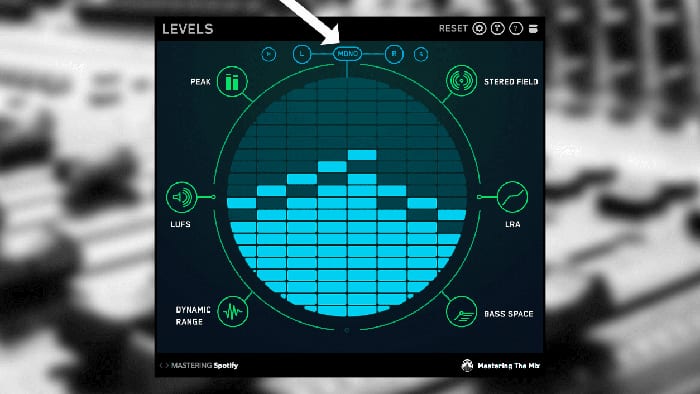
If the low-end disappears when you switch to mono then you probably have phase issues that will need to be fixed. Learn how to fix phase issues here.
It’s much easier to hear any phase issues when monitoring in mono, you’ll also be able to hear the frequency balance of the mix better when listening in mono.
You don’t have to mix a song in mono from start to finish. That won’t give you the full perspective of the mix since mono is only 2 dimensions (height & depth) whereas a mix is 3 dimensions (height, depth, & width).
Mix Low-End Based on Genre
One of the most important parts of getting a well balanced low-end is to understand the type of genre that you’re working on.
In some genres such as dance music, the low-end is usually the main focus so it’s treated differently compared to a pop song where the vocals are the focus.
There is a consistency of bass energy in genres such as hip-hop, R&B, DnB, dance, etc. Shooting for a similar low-end energy compared to your favourite mixes in the same genre is a great way to ensure a well-balanced mix.

Mastering The Mix created a plugin called REFERENCE to make matching the sonic qualities of great sounding mixes straightforward. Check out the video below on how to get your mixes sounding more like your reference tracks.
Perfectly Match The Relative Low-End Of Your Reference Tracks With BASSROOM
As mentioned, one of the best ways to eliminate a lot of guesswork when balancing the low-end of a mix is to use reference tracks. It almost guarantees your mix to have better translation across multiple sound systems.
Think about it this way, if 2 painters are shown a picture of the famous London bridge but one has to paint while looking at the picture and the other one can only look at the picture once.
Who will deliver the best results?
Obviously, the one who will paint while referring to the picture, not the one who only saw the picture once.
That’s how reference tracks work, you keep switching back and forth between your mix and other professional mixes in real-time and gradually get your mix sounding more like the pro mix.
With a plugin like BASSROOM you’ll be able to speed up the process of referencing your low-end with other professional mixes.
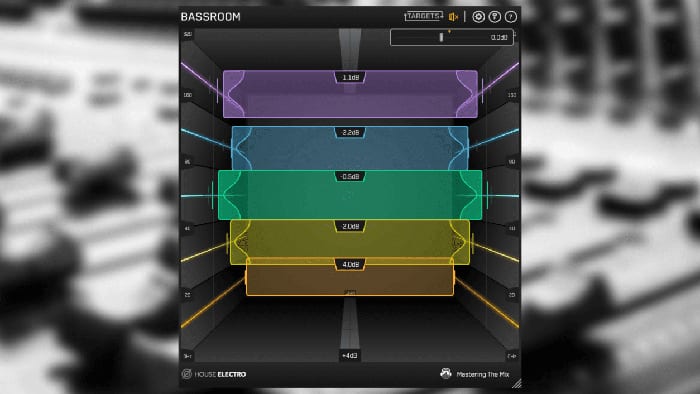
BASSROOM allows you to utilize target presets for many genres, but the plug-in also lets you import custom targets from your audio files.
‘EQ matching’ exists in other tools, however BASSROOM’s approach differs and focuses on how the human ear perceives the overall balance of a mix, giving it an audible sonic edge.
It also has filters specifically designed for transparent processing of low frequencies. Other EQs can introduce phase shifting, and that’s not necessarily what we want for the final mix especially if you’re happy with the color of the mix.
Bottom line: with BASSROOM you get no phase issues or pre-ringing. Instead, you get transparent equalization, better sound quality and faster workflow.

The Wrap
If you’re reading this part of the post then you’re clearly serious about improving your music production abilities… You’re now armed with the tips you’ll need to get a well-balanced low-end when mixing music.
It’s time to put all these tips into practice.
Save this page or bookmark it (if that’s still a thing) so that you can always refer back to it.
Great producers change the way the world listens
If you’re looking to turn heads with your own unique production style, ICMP’s pioneering approach to music education will provide everything you need. Our Music Production students all benefit from fully equipped Audient and SSL recording studios, Mac Labs, world-class gear, an exceptional team of tutors, masterclasses, exclusive events, collaborative opportunities, and a curriculum that covers studio and live work, engineering, composition, advanced skills, business, and professional development.
To completely immerse yourself in your music career, chat with our friendly Admissions Team via email enquiries@icmp.ac.uk or give them a call on 020 7328 0222.
Production Courses
If you’re looking to turn heads with your own unique production style, ICMP’s pioneering approach to music education will provide everything you need. Our Music Production students all benefit from fully equipped Audient and SSL recording studios, Mac Labs, world-class gear, an exceptional team of tutors, masterclasses, exclusive events, collaborative opportunities, and a curriculum that covers studio and live work, engineering, composition, advanced skills, business, and professional development.
To completely immerse yourself in your music career, chat with our friendly Admissions Team via email enquiries@icmp.ac.uk or give them a call on 020 7328 0222.

